If you’re no stranger to developer workflow then you know that sometimes - Git happens! The good news is that in most cases Git offers us a way out of a sticky situation we coded ourselves into.
Because of its decentralized nature, there is no single ‘undo’ command in Git that applies to every situation, but different stages of development require different solutions. Let’s take a look at the most common scenarios.
A rocky start: discard unstaged changes
You decided to make some changes to a file, but halfway through you thought to yourself: “Nah, I’d better start over before I reach a dead-end!”
$ git checkout -- <filename>
If your files are unstaged (you can check it by running git status) and you are sure that you want to discard them, you can use the above command.
Your current version of the file will be replaced with the last staged or committed version, and the changes you’ve made won’t be saved. You can also use this command to discard all local changes in all the files in the directory
$ git checkout -- <dirname>
A dev on the fence: Unstage files from Index
You made some pretty ingenious changes to the file before lunch. Or so you thought… Now you’re not so sure the file is a fit for the commit you are about to do, but you don’t want to delete it either….
$ git reset <filename>
The index is a staging area that allows you to choose what set of changes to include in a commit. If you already staged your changes with git add but you are not ready to commit those files just yet, you can unstage them by running the above command.
Your changes will be unstaged but will not be deleted from your working tree - will remain on the back burner until you decide to give them a second glance.
However, if you’re absolutely sure that you want to permanently delete all the changes you can run this command instead:
$ git reset --hard <filename>
Let’s take a step back: undo committed changes
You managed to spot the faulty commit, but it’s buried deep in your revision history… What now?
$ git revert <commit>
The good news is that it’s a bit early to panic - git revert comes to the rescue. It’s used to reverse the effect of an earlier commit, by creating a new, opposite commit. It is particularly safe to use, as it doesn’t rewrite the Git history (it doesn’t delete the bad commit but automatically creates a new one with inverted changes). That’s why it can be used both locally and in a shared repository. To find a commit ID you can use this command:
$ git log --oneline
The art of cherry-picking: apply a commit to a different branch
Oops… You made a commit to the wrong branch. Now you want to apply it to the correct one without merging the whole branch.
$ git cherry-pick <commit>
Cherry-pick allows you to choose a commit from one branch and apply it onto another. In order to perform the operation make sure you are on the branch you want to apply the commit to. Then run the above command. Don’t forget to remove the commit from the branch you mistakenly applied it to. To do it simply switch to that branch and remove the commit before you push the branch to the remote.
$ git reset --hard HEAD{index}
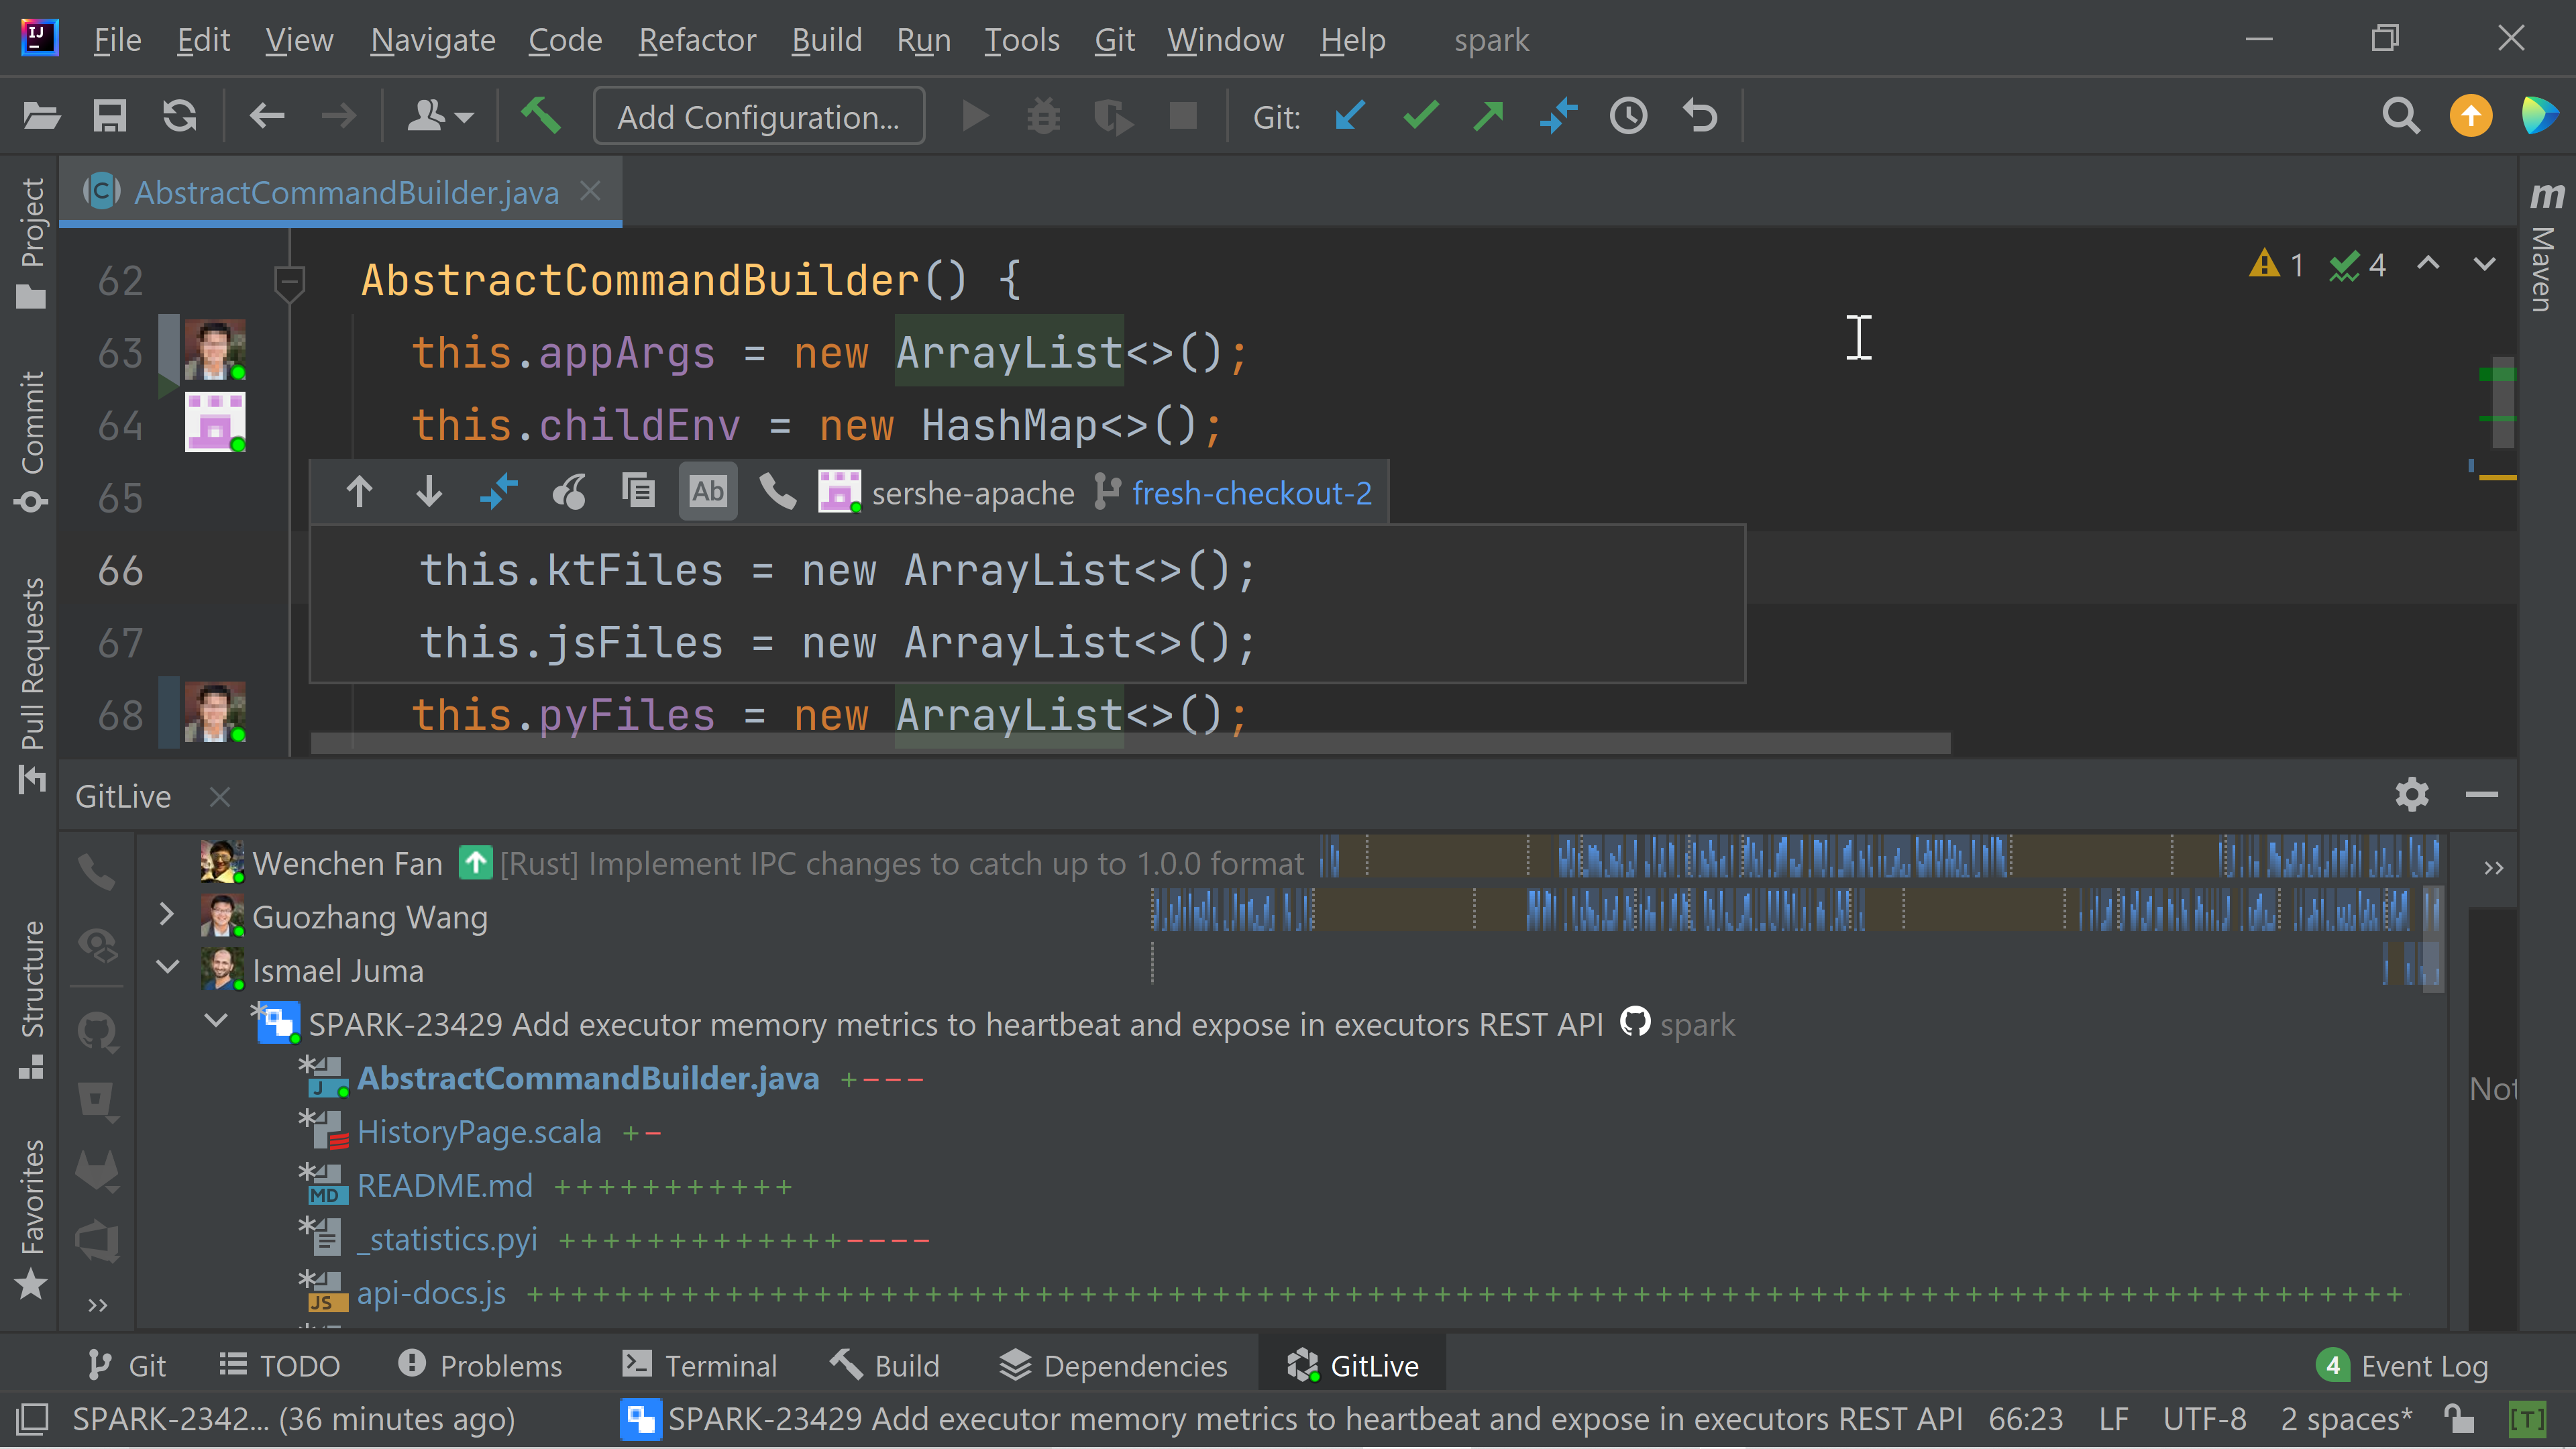
💡 Want to share some code without having to push and pull to Git? With GitLive you can cherry-pick your teammates' uncommitted changes straight from their local working copy. Read all about it here.
If I could turn back time: modify the commit message of an old commit
While looking at the commit history, you’ve noticed that there is a typo in one of your older commits…
$ git rebase -i <sha>
With this command, you can edit, squash and delete commits by navigating the menu from the command line. As a rule of thumb, you should never modify the Git history in the remote, but you can safely use it locally.
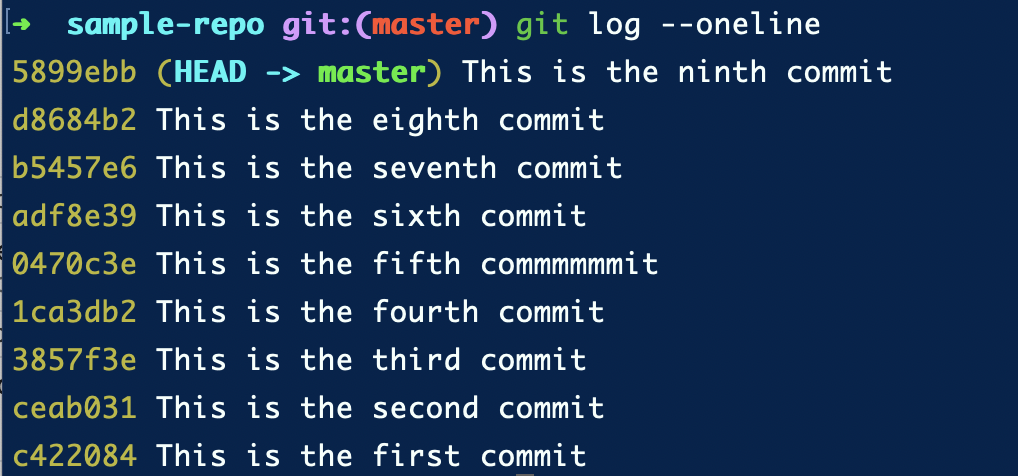
To warm-up, let’s try to use interactive rebase on our local sample repo. You can get the list of the commits by running
$ git log --online

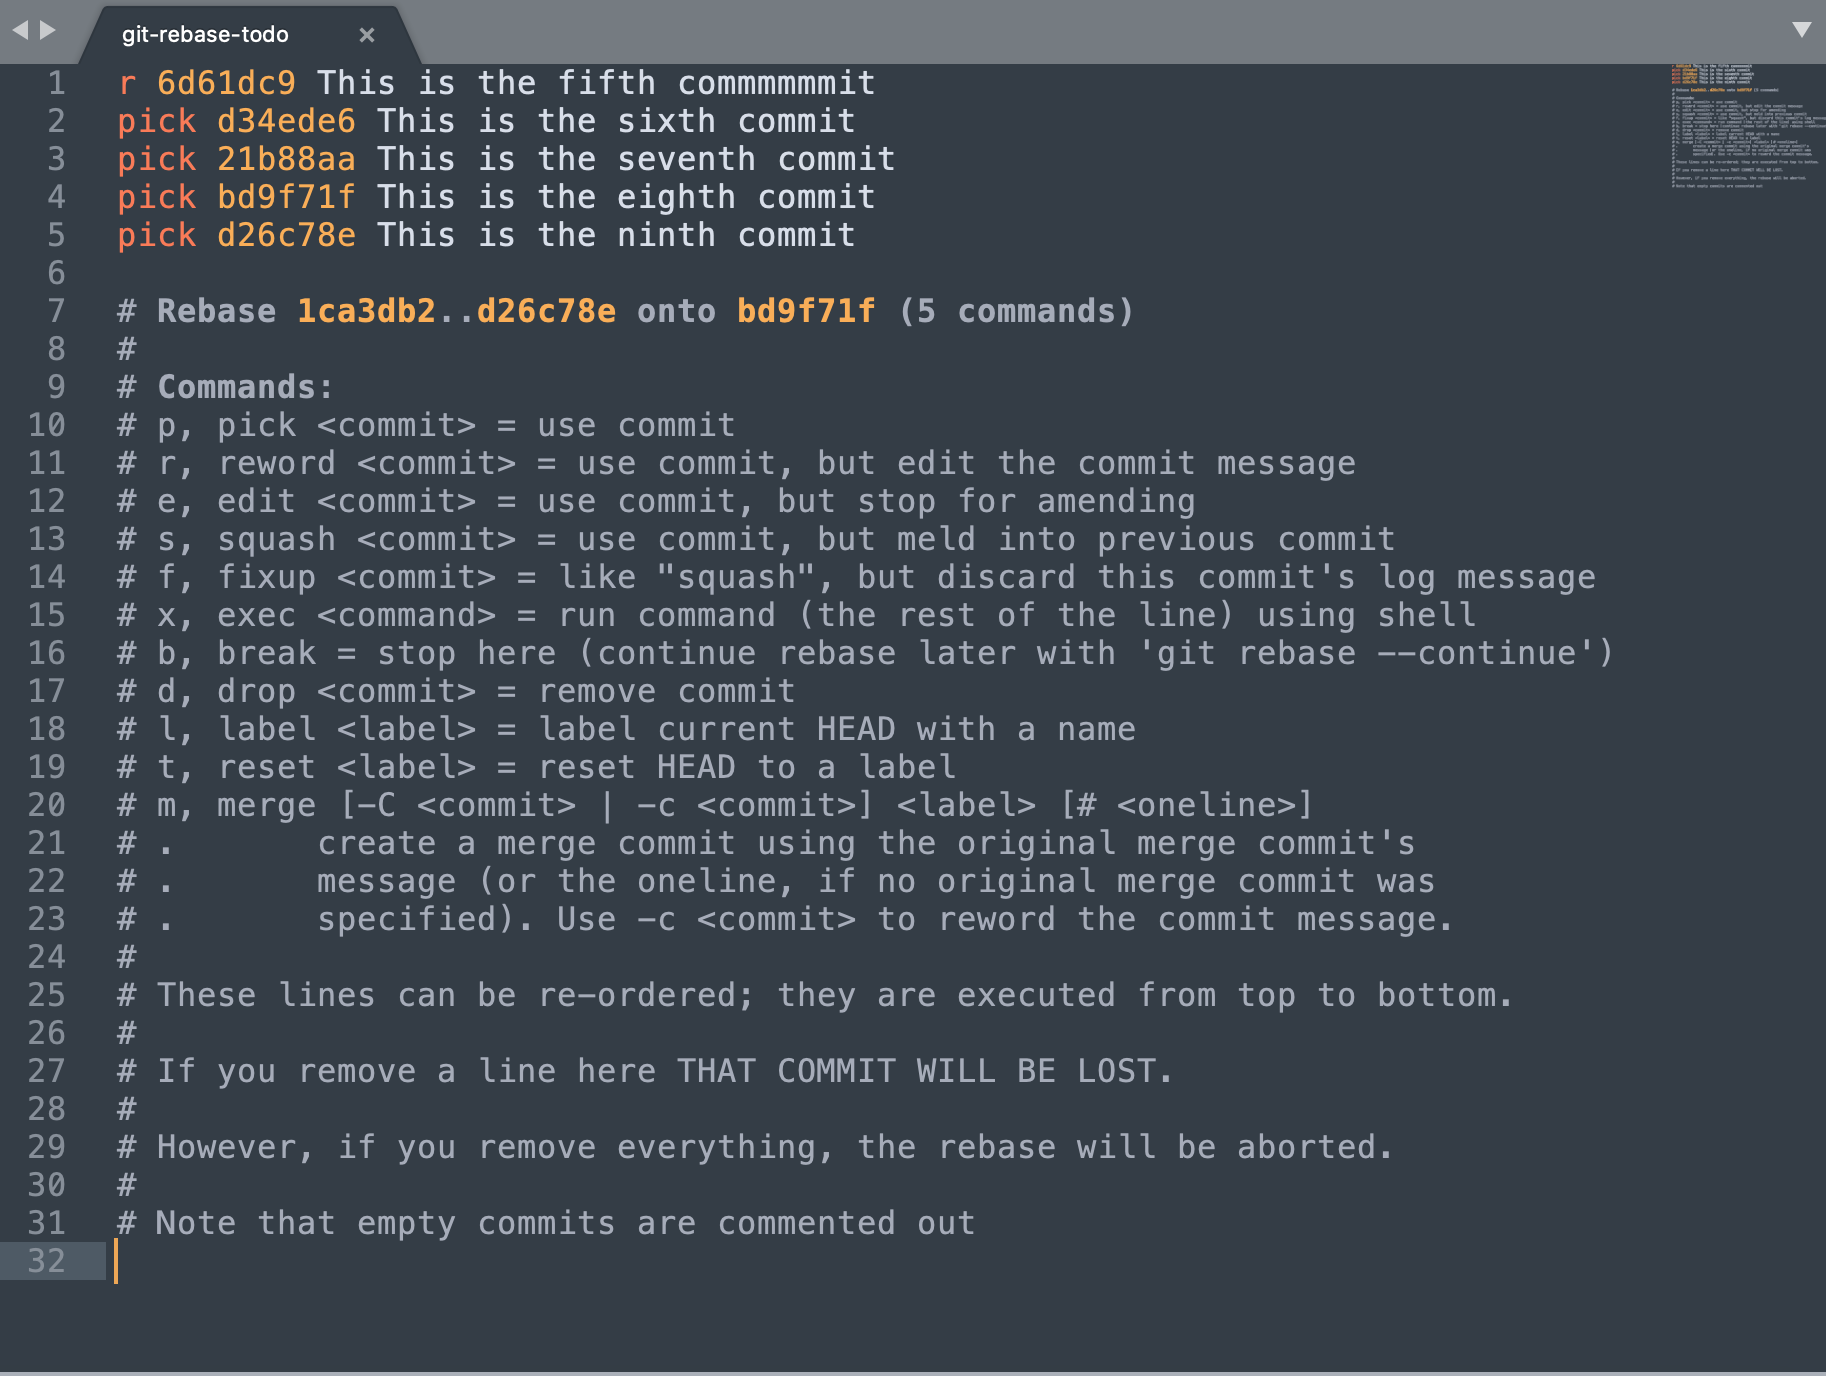
To fix the typo in the fifth commit message, run $ git rebase -i <sha> and replace sha with the last correct commit (in our case it’s the 1ca3db2)

After typing this command, the default editor in your environment is going to open up. Follow the instructions in order to perform the operation of your choice. In order to edit the commit message, replace the word pick with r, save and close the editor window to continue rebasing. Don’t change the message yet! The editor will open again, prompting you to edit the message. You can now close the editor and come back to the terminal.
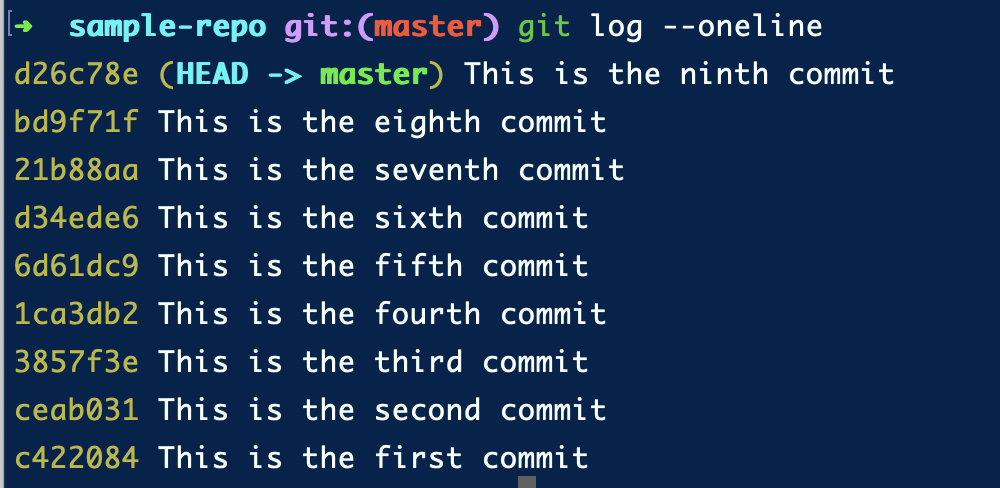
After running git log --oneline you will see that the typo was fixed. Piece of cake!

Thanks for reading! Hopefully, with those tricks up your sleeve no minor Git mishap will hold you back. If you want more Git tips, check out the previous articles from our Git series: Top 5 Git Tips & Tricks and 5 Git Tips To Level Up Your Workflow. Happy Git-ing!


Comments