 Git
Git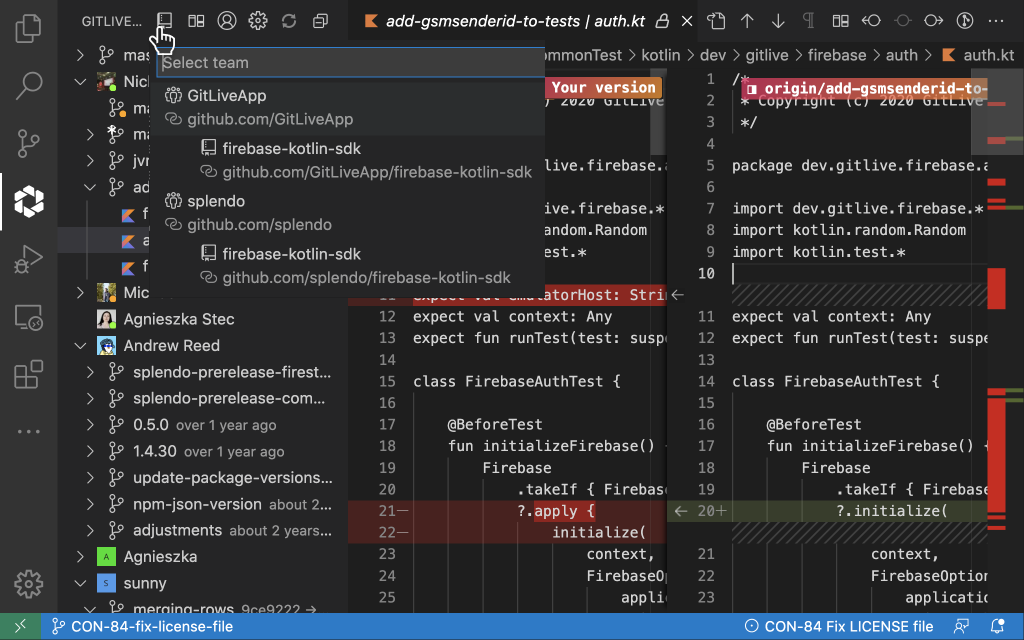
Get the ultimate perspective on all the work in progress in your repository and how it compares or possibly conflicts with the changes you are making on your own branch with the new repository view.
We think you’ll find it so useful we’ve made it the default view you’ll see in the GitLive sidebar/tool window. But before we go into more detail on the repository view, let’s recap how the previous view (now called the organization view) works.
The organization view lists all the branches ahead of the default branch, grouped by author, for every repository in your organization. Depending on the size of your organization that can be a lot of information.
Know when your branch falls behind
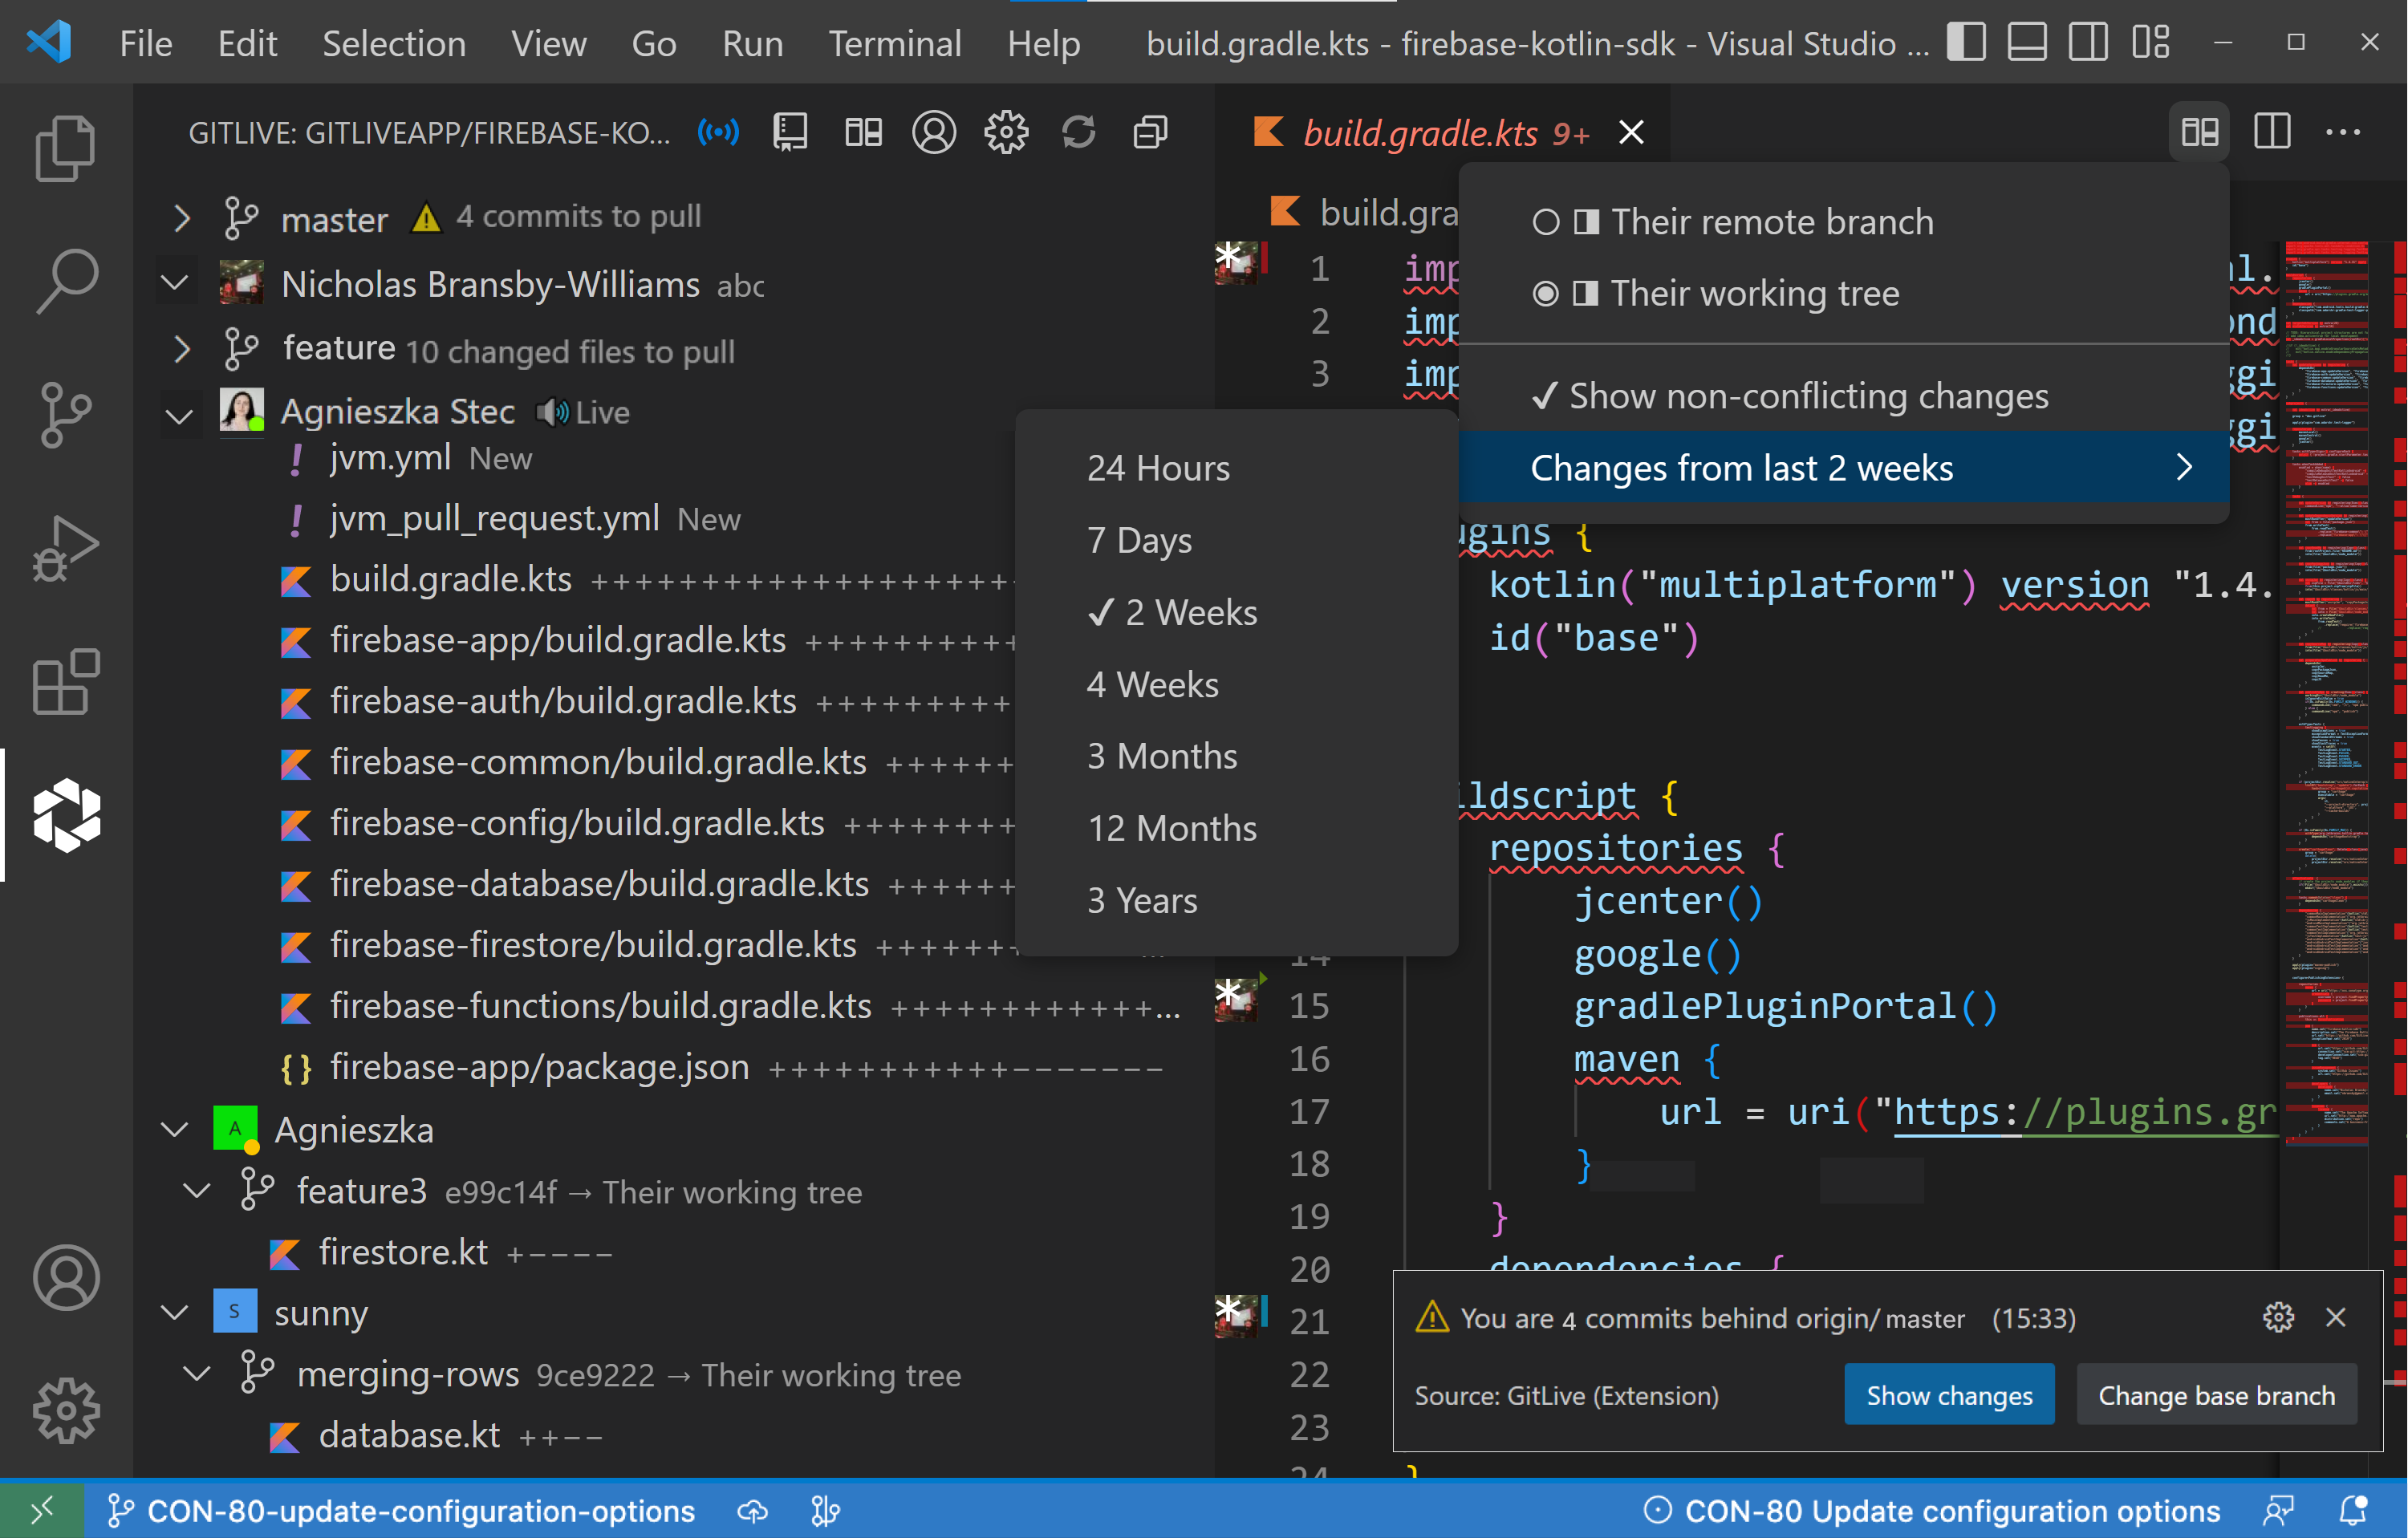
As you have probably guessed by the name, the repository view only shows the authors and their branches for a single repository. In fact, the repository view only shows the remote branches ahead, in terms of commits, of your current branch.
That is an important distinction from the organization view, which shows remote branches ahead of the default branch of each repository in your organization. It means the repository view will also show when you are behind the default branch or the remote tracking branch of your current branch.
| VS Code | JetBrains |
|---|---|
|
|
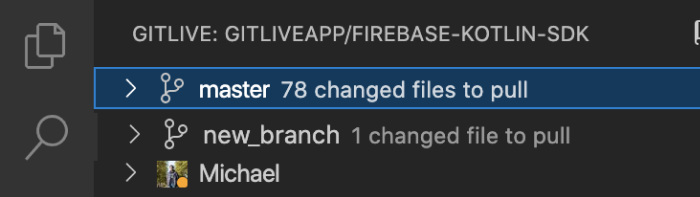
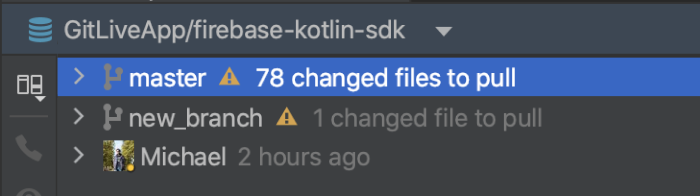
As you can see, these show at the top level of the tree and let you know how many changed files you need to pull. And as you probably already know, it’s good Git hygiene to pull these changes sooner rather than later!
Switching between repository and organization views
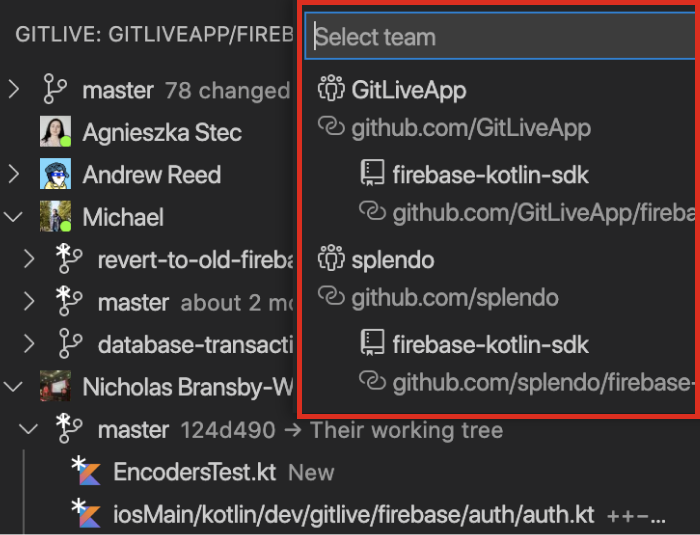
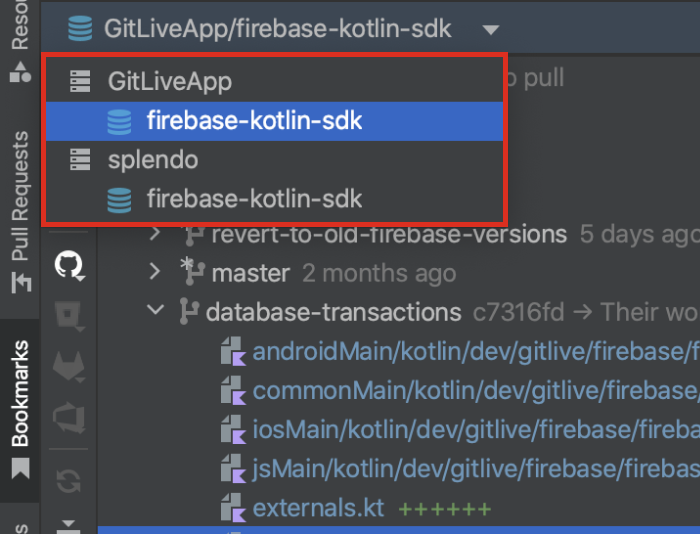
Use the new team selector to switch to the organization view or to a different repository view if your project or workspaces comprises more than a single repository.
| VS Code | JetBrains |
|---|---|
|
|
|
The popup lists all the organizations and repositories found via the remotes of the local clones in your project or workspace.
| VS Code | JetBrains |
|---|---|
|
|
Powerful new diffing options
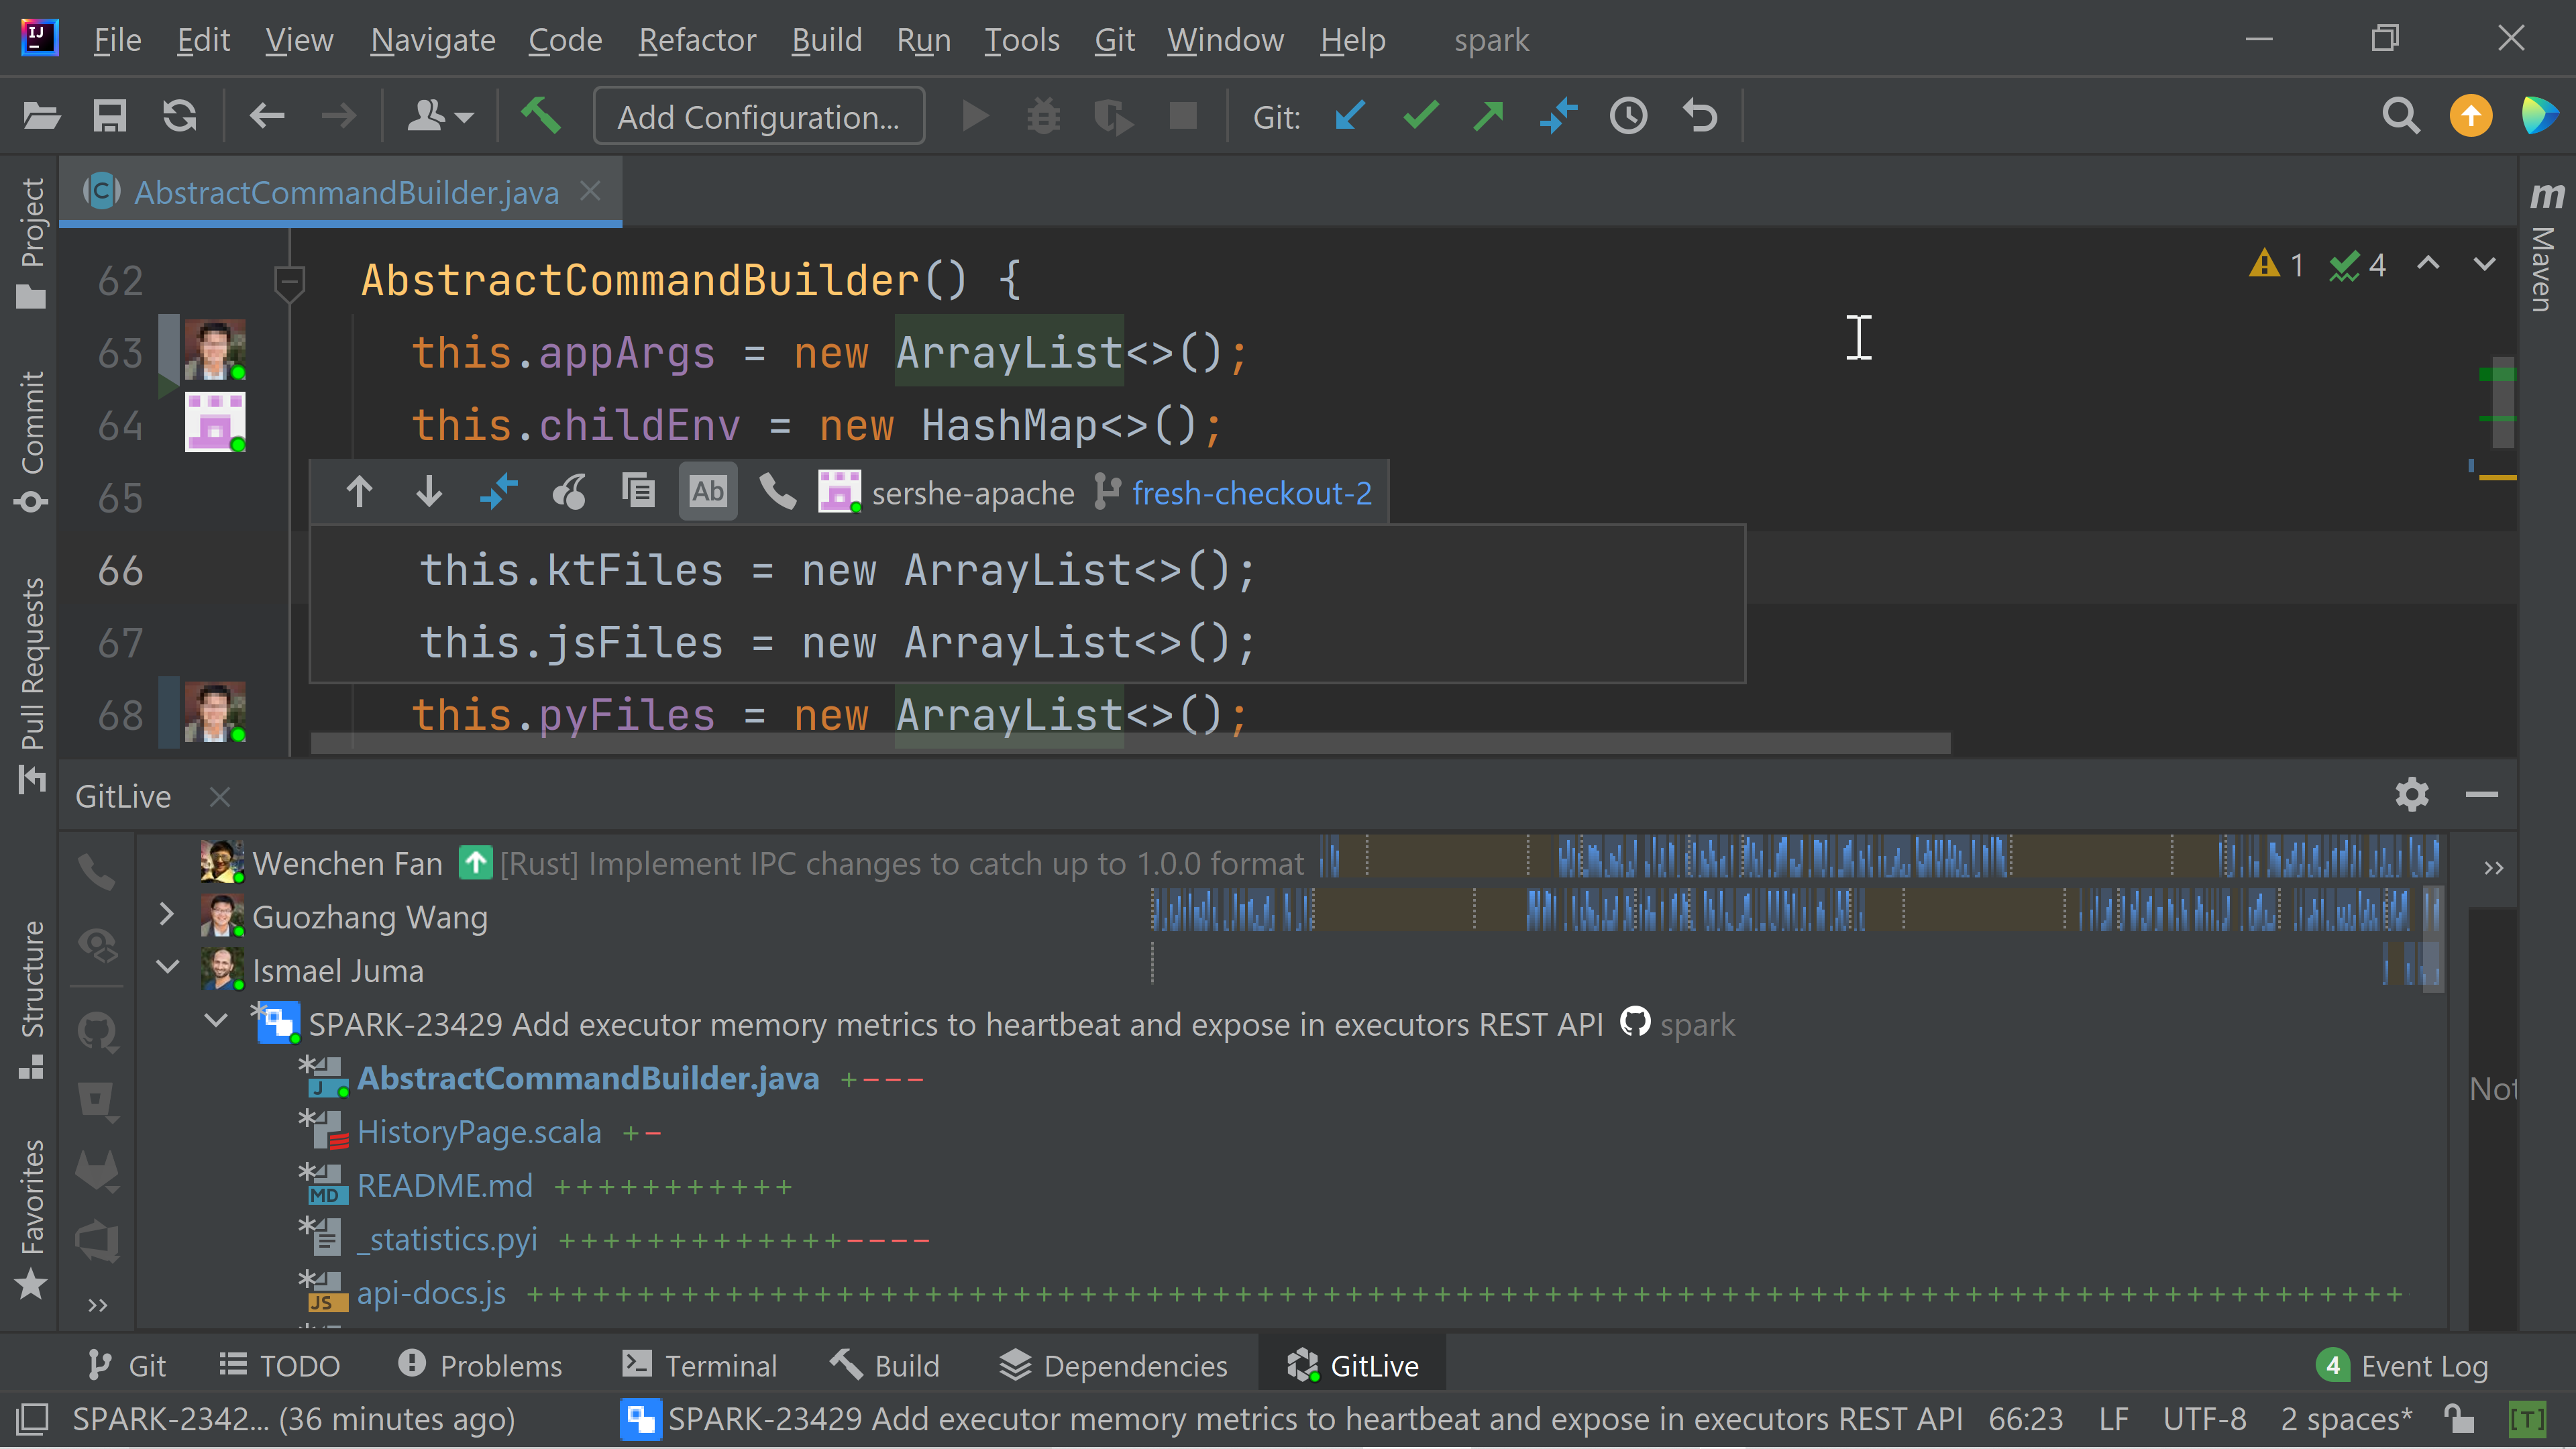
GitLive performs what is known as a three dot diff between your local HEAD (on the left), and the heads of all the remote branches in your repository (on the right), to populate the tree in the repository view.
This shows you all the changes between the common ancestor of your current branch and each remote branch, similar to what you would see in a PR on GitHub.
You can use the new view options to customize this diffing process by changing what is used as the left and right sides in the diff. These options are available for the tree, individual file diffs and also in the main editor to affect the change indicators shown in the gutter.
Tree view options
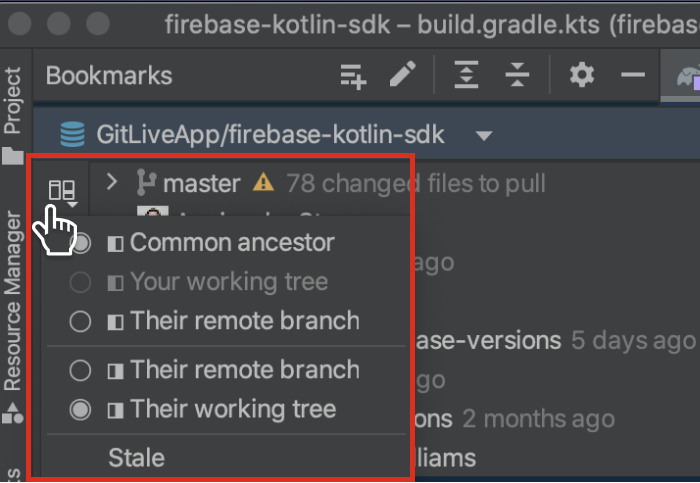
In the tree, you can find the view options in the sidebar title in VS Code and in the tool window toolbar in JetBrains.
| VS Code | JetBrains |
|---|---|

|
|
The options available for left and right in the tree are the following:
| Left | Right |
|---|---|
|
Common ancestor. Selecting this for the left will include all changes pushed to the remote in the diff of the branch. Their remote branch. Selecting this for the left will exclude all changes pushed to the remote in the diff of the branch. |
Their remote branch. Selecting this for the right will exclude any local changes not yet pushed to the remote in the diff of the branch. Their working tree. Selecting this for the right will include any local changes not yet pushed to the remote in the diff of the branch. |
You can only select their working tree for the right when you have signed into GitLive and you and your fellow contributors have chosen to share working tree changes.
An asterisk appears on the icon of any branch or file with working tree changes and it’s possible to see the same branch multiple times in the tree if multiple clones exist.
File diff view options
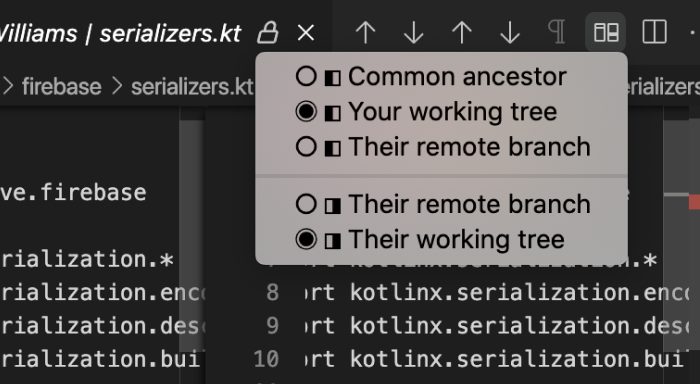
You can find the view options for an individual file diff opened when clicking a file from the tree in the title of the diff editor.
| VS Code | JetBrains |
|---|---|
|
|
The options available for left and right in a file diff are the following:
| Left | Right |
|---|---|
|
Common ancestor. The file in the left editor will be the revision from the common ancestor commit. Your working tree. The file in the left editor will be your local file which you can edit directly from the diff view. Their remote branch. The file in the left editor will be the revision from the head of their remote branch. |
Their remote branch. The file in the right editor will be the revision from the head of their remote branch. Their working tree. The file in the right editor will be the revision from their working tree. |
You can only select their working tree for the right when you have signed into GitLive and you and your fellow contributors have chosen to share working tree changes.
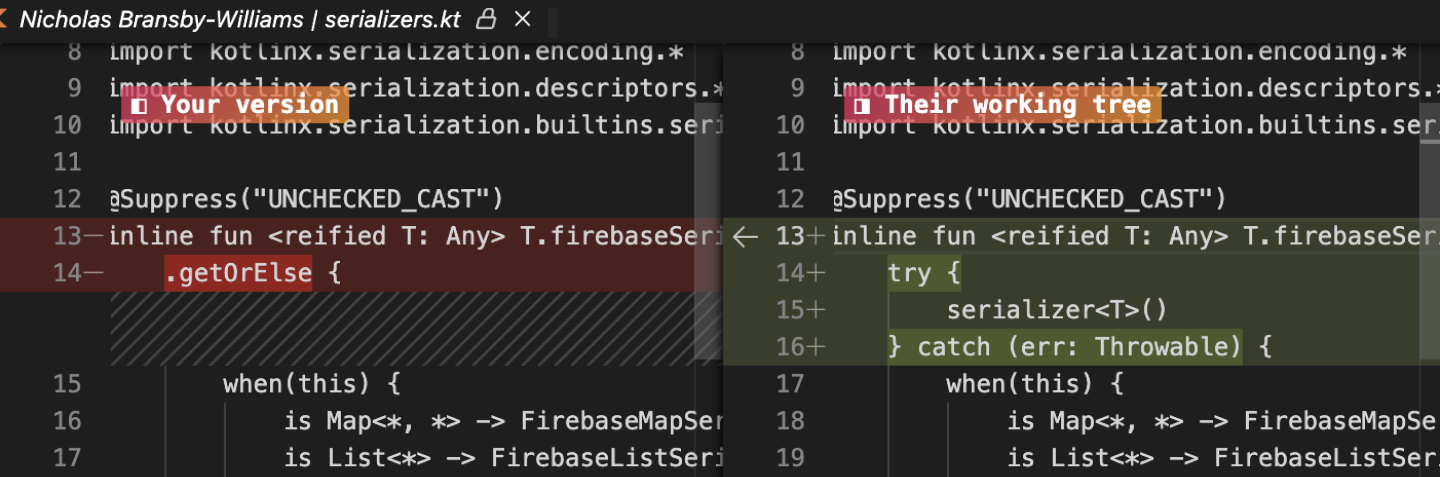
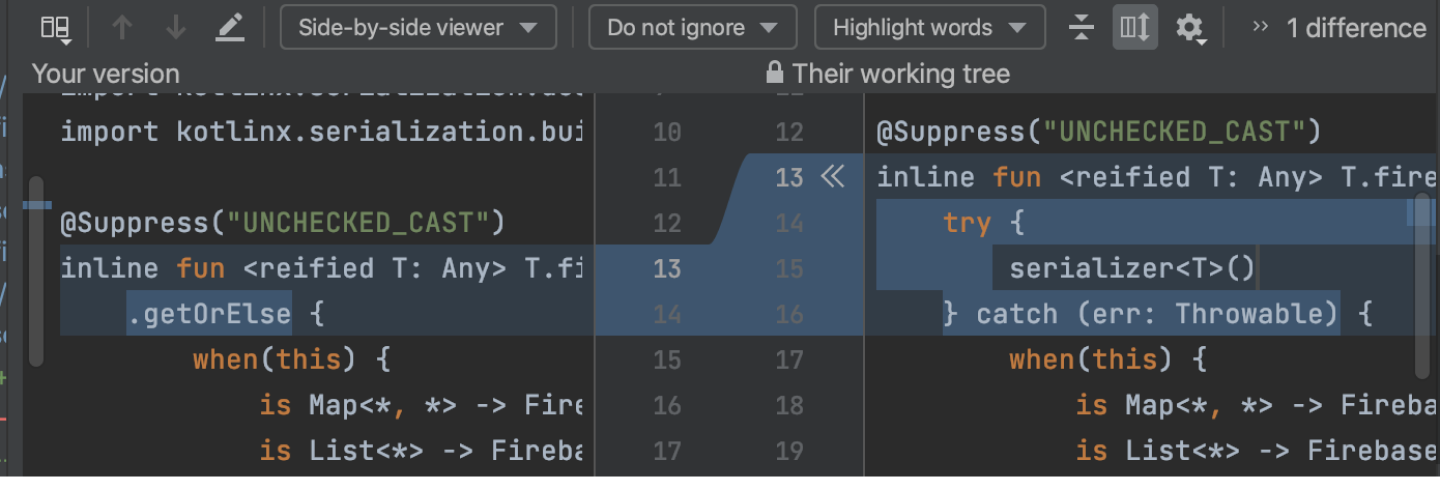
By changing the left to your working tree you can easily compare changes to your local version of a file and cherry-pick individual changes into your local file using the arrows in the center gutter!
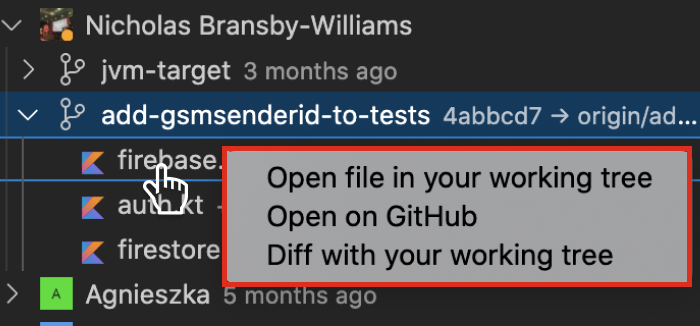
You can jump straight into a diff with your working tree by right-clicking on a file in the tree and selecting Diff with your working tree.
| VS Code | JetBrains |
|---|---|
|

|
From this context menu you can also open your local version of the file (if it exists) in the main editor via Open file in your working tree
Main editor view options
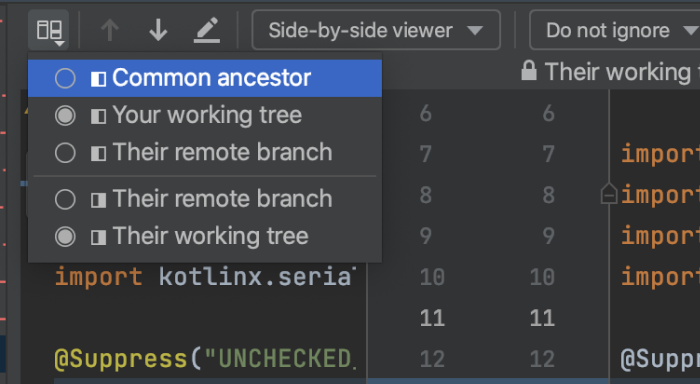
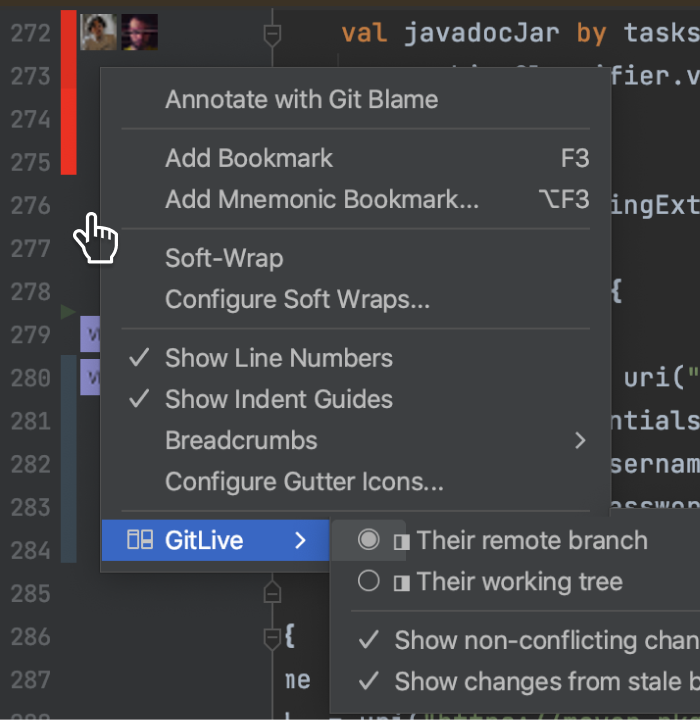
You can find the view options for the main editor in the editor toolbar in VS Code and on right-click on the gutter in JetBrains. These affect the change indicators shown in the gutter of the editor.
| VS Code | JetBrains |
|---|---|
|
|
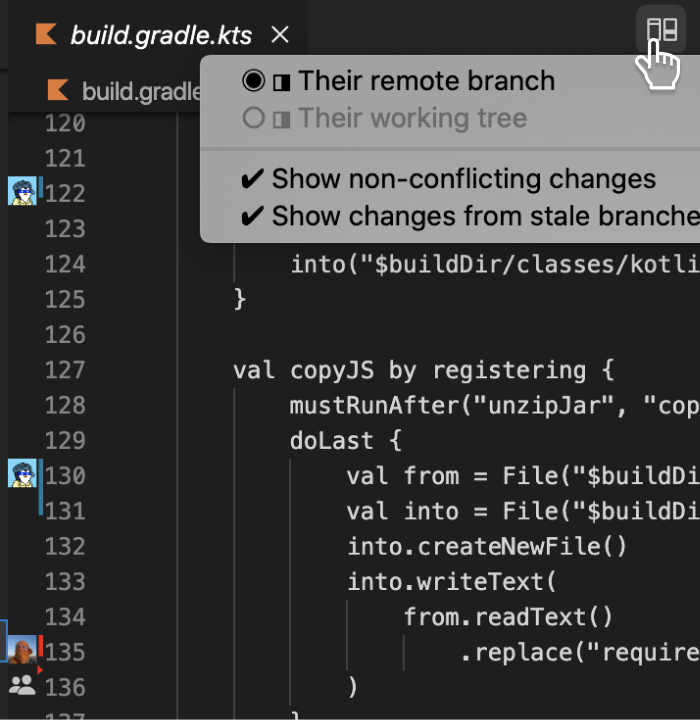
The options are only available for the right in the main editor as the left is always your working tree and the gutter indicators always show the changes compared to your local file.
| Right |
|---|
|
Their remote branch. Selecting this for the right will exclude any local changes not yet pushed to the remote from showing in the gutter. Their working tree. Selecting this for the right will include any local changes not yet pushed to the remote in the change indicators shown in the gutter. |
You can only select their working tree for the right when you have signed into GitLive and you and your fellow contributors have chosen to share working tree changes.
That’s all folks
That’s it for now, we would love to know what you think of these updates and how we can make GitLive better for you, so please reach out via the comments section below.
NOTE: As this is a major version update make sure your whole team upgrades, all team members need to use the same major version of the plugin otherwise you may find some features that do not work correctly.
Comments